I love dresses.
I was recently at old navy looking for some new running clothes and they had a ton of dresses on sale! I couldn't resist...I tried on about ten and bought two. The only catch: they were both too big. When I find something like that though it just gives me the opportunity for a new craft! I think, "I can fix that."
Size: XXL, but for only $6.97 this was going to be a cute dress!
Starting out, the neckline was WAY too big. As for the sleeves...there weren't really any. It is just the style of the dress. I didn't mind too much, but Nathan didn't like it one bit, so I decided to fix those too.
I first put the dress on and pinned the neckline to be the size I wanted.
Carefully, I took the dress off and aligned the pins on either side so that the neck was even. I then cut straight along the top on both sides. Be careful when you're cutting through several layers that all layers are flat. If there is a crease, you will end up with a strange cut that you will have to compromise for later. (yes that happened to me)
The cut looked a little strange having the shoulder line go up rather than down, but I went with it.
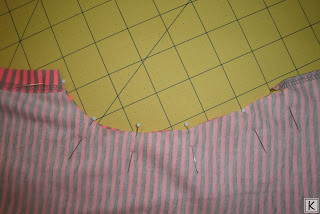
Flipping the dress inside out, I pinned both sides, making sure to keep it even. As you can see, my cuts are far from perfect, but as long as you pin and sew in the correct places, it should be okay right?
Sewing the neckline and flipping right side out...a new, much better fit neckline! Hooray!
I put the dress back on, making sure the neck fit right...and it did, so onto the sleeves. I brought my arms up and pinned where the sleeves would be fitted, but not tight. With such a large size dress, I had a lot of material to work with, so that was a plus. I carefully took the dress off and measured to make sure the sleeve sizes would be even on both sides. For me, that was 2.5 inches from the bottom of the opening.
Next, I made a cut that I thought would make a good sleeve, but wouldn't destroy the look of the dress. Having a dress that was loose, I decided the sleeves would look best to be taken in just a little bit at the end. I made a very gradual curve that led into the side of the dress to avoid any extra bumps.
To make the same cut on the other side, I laid the piece I had cut on top and followed the curve.
I now had the same cut on both sides. I turned my dress inside out and pinned both sides.
I then sewed along the curve to make the sleeve! I put the dress on; the neckline was good, but the sleeves were just okay. There was an odd bump from where the shoulder line was sewn. I took the bump in a little bit, but it still didn't look quite right. I then searched through my button stash and found two gray buttons to match. I folded the bottom of the sleeves over and attached the button to hold it down...much better.
A new summer dress to wear!
~K.A.N.


No comments:
Post a Comment