Saturday, May 31, 2014

T-Shirt Quilt Part 1

I have always wanted to make a t-shirt quilt and I have finally started! A few months ago, I gathered all of the shirts I wanted to use. I decided to make the quilt with only shirts from our time at Washington State University; mostly because I really like things to match. 

I got some awesome red fabric from a thrift store a couple of years ago and always knew I would use it for a blanket just because of how soft it is! It will be perfect for this one.

I had 9 shirts total and ended up just using 8. The shirt I decided not to use was made of a different fabric and I thought it would look better to not use it. 

The number of shirts of the different colors ended up working out perfectly: 3 gray, 2 white, 2 red, and 1 black (using the front and back to make 2 black panels). 


Starting with the first shirt, I cut up both sides, around the sleeves, and around the neck. This gave me a front and back panel. 


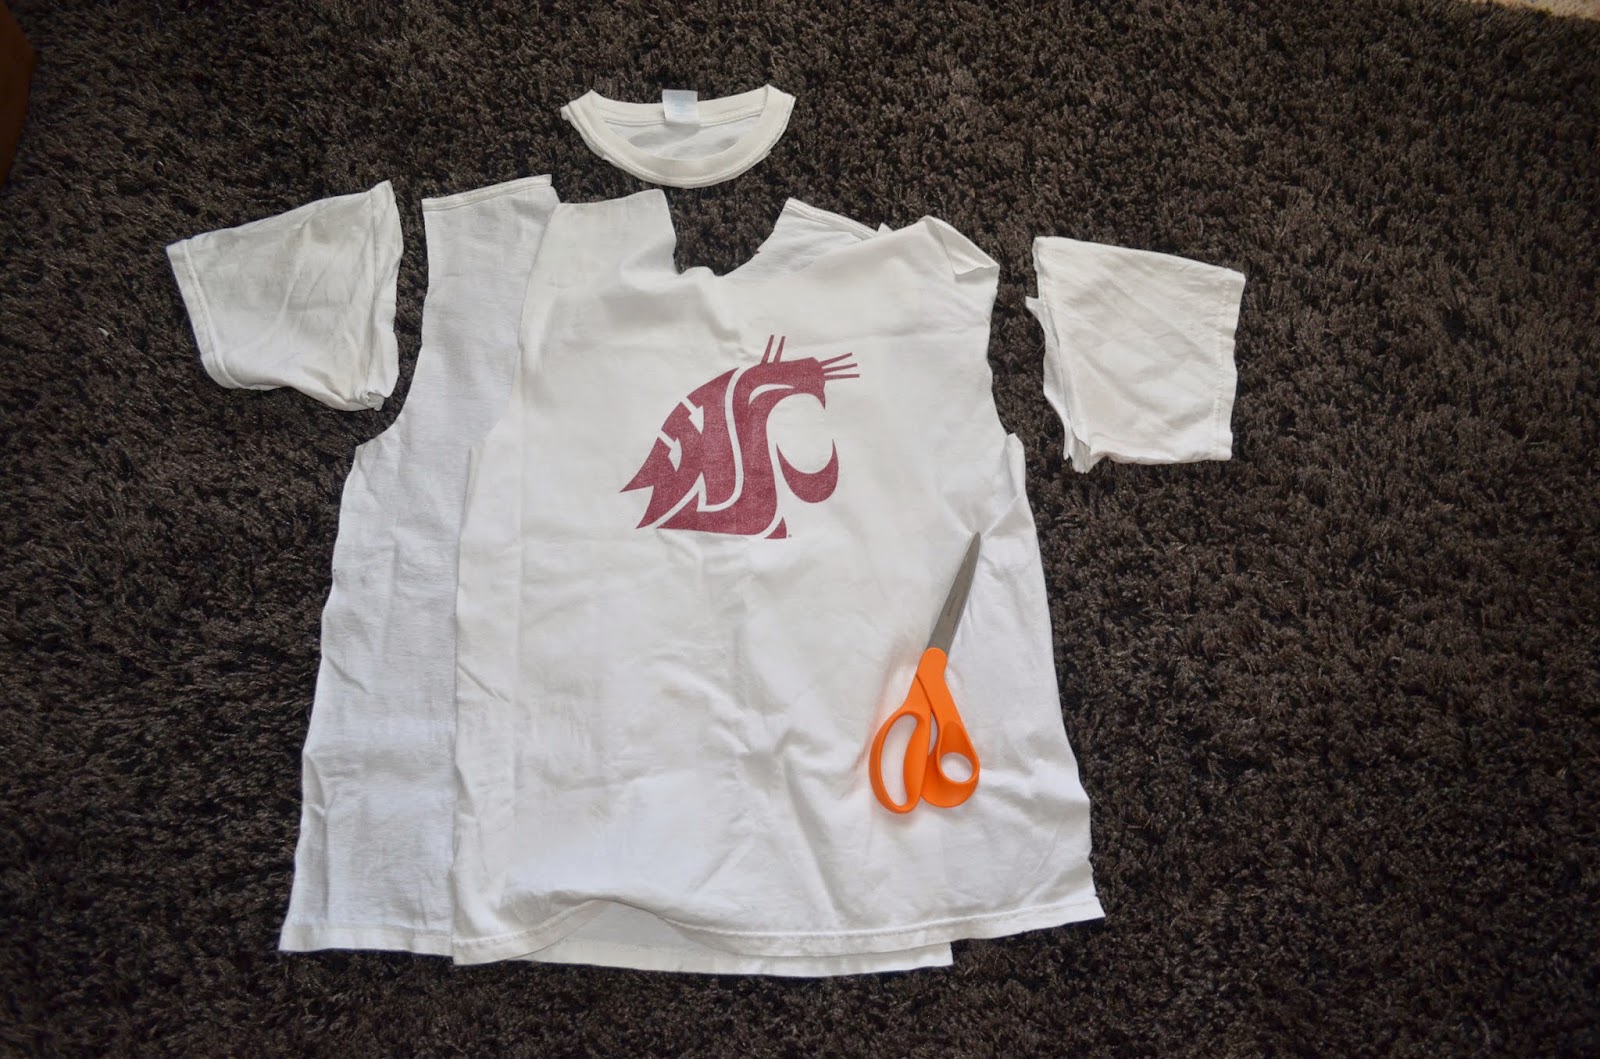
I then lined up my ruler as straight as possible with the front design and cut across the top. 


Centering the design with the edges to be cut, I cut it so the rectangle would be 14 inches across. For this shirt, the cougarr design is 8 inches across, which means I needed 3 inches on each side.


I then cut the bottom to make the finished rectangle 18 inches long. 


I then had 9 large rectangles that were each approximately 14 by 18 inches. I thought the quilt could use a little bit more of something, so I cut 6 rectangles 5 by 17. 

Here is what I have so far with the rectangles laid out on the back fabric (minus the white shirt that was cut above):


In between the t-shirt pieces will be plain black cotton. 

My next steps: 
1. Buy interfacing for the t-shirt fabric to help it hold shape better; iron on all rectangles
2. Cut black cotton
3. Sew top together
4. Quilt
5. Bind

I think it will be fairly simple and I'm excited to have it done!

Friday, May 30, 2014

Senior Pictures

My family came and visited us in April. My mom, dad, and brother (Zack) signed up to run a 10 mile race with me, so they just made it a whole family weekend trip. It was tons of fun!

Before they came, my mom asked if I would take senior pictures of my brother (David). I of course said yes! They also brought along David's best friend Justin and I was able to do his senior pictures as well. It worked out perfect to have Justin there with David. They made each other laugh and we were able to get some great pictures of them both. 


  Thanks for making me laugh too! 


~K.A.N.

Wednesday, April 16, 2014

Baby Boy Nursery

This post is long overdue considering my baby boy is now 8 1/2 months old!! 

When the time came to find out what we were having, I was so excited that it was a boy! Part of my excitement came from getting to do this nursery. This nursery is a little makeshift with pieces coming from all over the place, but I absolutely love it. 

When you walk in the door: 


From the other corner of the room:


This wall is probably my favorite!


The banners were made by a friend and were put up at my baby shower. I was so excited to keep them because I knew they would add such a cute decoration for his room!

The crib was bought at a yard sale for $25!!! Talk about a steal. We actually got it before I was even pregnant, but we knew we were going to start a family soon enough and we just couldn't pass it up.


This chair is the same as the chair I re-upholstered, but it was not re-upholstered, so I threw together a quick (and not-so-pretty) cover for it to match his room. But hey, it matches!

The pillow was a small pillow from a thrift shop - probably about 50 cents. I made a quick cover and it matches great!

The lamp was re-done to match his room and it's a perfect fit. 

The small side table used to be a little chess table that my husband has had for a long time. The top broke, so my grandpa helped me build a new top for it. I painted it white and it sits so well next to the chair!


Ideally, I wanted to have wooden letters painted white for his name. I did not have the means to make them and didn't want to spend the money on them, so I decided to use what I had. These letters are made of stiff plastic mesh that I cut to the letters. I then picked the fabric to match the room and cut it a little wider on all sides than the mesh. Each side was then folded over to the back and hot glued down. I used ribbon hot-glued in a loop at the top to allow me to hang them. 


I LOVE how these curtains turned out! They are made from a twin flat sheet cut in half and hemmed. I then measured the sheet and cut and sewed on the navy blue to have 3 stripes of each.  


These shelves were made by my mom and are so perfect for all of his books!


I finally got these pictures up just a month or two ago. They make the perfect finishing touch to his room. Left to right: newborn, christmas/favorite picture, 6 months.


From left to right in this picture: 

The two baskets are for dirty laundry, one for colors and one for whites.

The dresser was given to us by my parents. We painted it white and bought the wooden knobs and painted those blue. 

We got the changing pad from my sister-in-law and it fits perfectly on the dresser. I made the changing pad cover by using the actual changing pad as a "pattern". I was pleasantly surprised at how well it turned out!

The nightstand was also given to us. We took the old handle off and got a knew wooden one and painted it so it matched the dresser. It is so functional. The extra diapers and wipes go in the cupboard below. The small basket in the opening holds the burp cloths, and the top basket holds the current diapers, wipes, lotion, thermometer, etc. 


That completes the room tour! I hope you love it as much as I do!

~K.A.N.

Monday, January 27, 2014

Sock Monkey

My little guy was only about 5 months old at Christmas, so I knew presents weren't going to be a huge deal for him. Even still, I wanted to do something for him. He had started playing with toys, so I found this tutorial and loved the idea of making him a sock monkey! 

I went to Walmart and got a pack of 3 cute crew socks for about $5. I had them for a couple of weeks before I finally sat down and made one. When it was finished, I was so relieved to be finished and excited with how cute it was!


 I followed the tutorial linked above; her instructions are excellent. I expected it to be a fast project, but it ended up taking about 3 hours to do. It was easy, it just took a long time because of all the hand stitching that had to be done. 

I was originally planning on making all three pairs of socks into monkeys, but decided that the one would be fine for now. 

Baby O had fun opening presents on Christmas morning. I saved his sock monkey for last and he loved it! 


He still gets so excited every time I give it to him to play with. He loves to chew on the right arm and leg. It's a great toy because when he hits himself with it or rolls over it, I don't have to worry about it hurting him. 


~K.A.N.

Wednesday, January 22, 2014

Curtains!

In August we moved into a 3 bedroom, bottom floor apartment. After a smoke smell just wouldn't go away, we decided to try to get into a different apartment in the same complex. With a little more thought, we decided that a 2 bedroom would suit us just fine. In December, we were able to move into a 2 bedroom middle floor apartment and are just loving it! 

There is quite a difference between the windows of the bottom floor and the windows of the middle floor. The windows on the bottom floor start half-way up the wall, go all the way up and are across the whole room. The windows in our new apartment are on one side of the room and go floor to ceiling. 

The curtains I was planning on using were ones that we have had for a couple of years. They are brown shear curtains, more for decoration than covering. They worked great on all of the windows up until these ones, and I knew I was going to need to adjust them if I wanted them to work. 

Since we only have one long window in our room, we only needed one long curtain. My original plan was to just sew the two shorter curtains together. After looking at them, I realized that if I did that, there would be a large darker line across the middle. (The more times you fold a shear fabric over itself, the less shear and the darker it becomes).


I didn't want them to look terrible, and I had extra length to play with so I decided to add some ruffles to hide the dark middle line. I laid the curtains down on the floor and began to pin ruffles in. I adjusted a few times to get the overall length to what I needed. I pinned about 5 pins across each ruffle. 

I picked up the curtains to take them to my sewing machine. When I did that, in between each pin fell down a little bit and I liked it even more than the previous ruffles! So I just decided to sew a little line where each pin was and it worked. 


I also didn't want completely sheer curtains and looking through my fabric stash I found a dark brown piece of fabric that was the exact size of the curtains! That was awesome. So I sewed a line across the top to line them and hung them up!


From the other corner of our room:


Close up:


 If we want some light to come in, but don't want to have our curtains opened all the way, we use a ribbon to tie the lining back:


 And sometimes we open them all the way!


I'm pretty pleased with how they turned out. Right now, we are all about making things work without spending any extra money if we can. With these curtains, we made it work.

~K.A.N.